Here is a simple tutorial that illustrates the use of CardLayout with the Netbeans GUI-Builder. For this I am using Netbeans 6.7.1.
1. Create a Java Desktop Application.
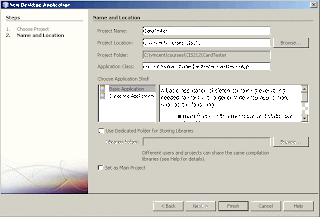
2. Name your application CardTester (or whatever you want, I am going to name mine CardTester). Make sure you choose an appropriate name for your Application Class including the package name.
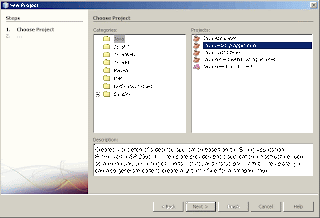 Click Finish when you are done. The application is created.
3. Ensure that the Inspector window is visible. If not look in the Window > Navigation menu for it.
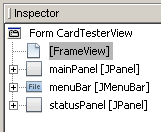 In the Inspector Window you can see all the components that make up your user interface and how they are associated with each other. The default application is made up of the main application window along with a mainPanel and a menu bar and a statusPanel. We will add a CardLayout to the mainPanel.
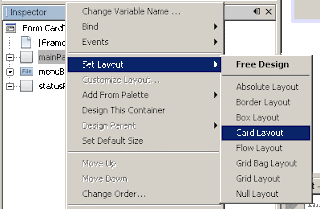
4. Right click on the mainPanel, select Set Layout from the context menu then select Card Layout.
 5. Now lets us drag two cards onto the mainPanel. From the Palette window, click on Panel and drag it onto the mainPanel. You will see the panel under the mainPanel in the Inspector window. Make sure that the new panel is selected and change some properties.
name : card1
Card Name: card1
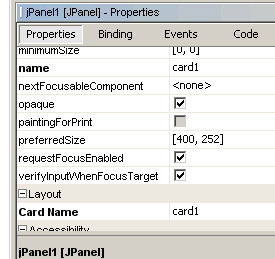
Change any other property that you wish.
6. Repeat step 5 to add another card. Lets call this one card2. The Inspector window should now look like to following illustration.
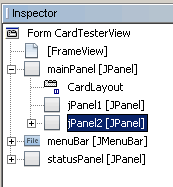 7. Lets add some content to the cards so that we will be able to see them change. Make sure that card1 is selcted and drag a label onto the card, set any text you wish. Next select card 2 and do the same.

8. Now we can add some functionality that will cause the cards to flip. For this we can use a single button that will flip the cards as it is clicked. Drag a button to the status panel. Right click on the button and choose Set Action... from the menu.
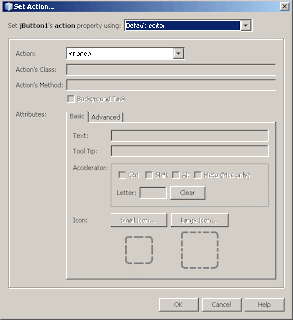 From the Action drop down select New Action... type in a Method Name for the action. You may also add the display text, tooltip and accelerator for the Button.
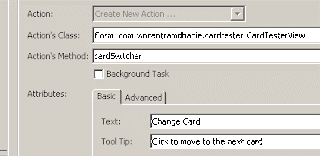 Click OK when ready. The code view becomes visible. The method that you choose is added to the code.
9. Add code.
@Action
public void cardSwitcher() {
CardLayout cl = (CardLayout)(mainPanel.getLayout());
cl.next(mainPanel);
}
10. Run the application. If you are really really lucky, when you click the button the cards will change.
I hope this very simple tutorial makes it a bit easier to use the Netbeans GUI-Builder to create a Card Layout.
For more info on using the Card Layout itself visit this page.
14 comments:
It's a very useful toutorial, but I've another question.
In my main frame I'd like to have a tool bar with two buttons, and use this buttons for change between panel1 and panel2.
I don't understand where put the tool bar, in mainPanel I can't.
Thanks.
Can I use
jPanel1.setvisible(false);
jPanel2.setvisible(true);
to show required panel in card layout?
Thanks so much, I used this to create a signup form with a second card with 'x' on it. Really helped out ALOT! :D
Much aprreciated
Thanks a lot!!!!!
In Netbeans 6.9.1 Works Correctly, except for the "Set Action", but the code works 1000%
Thanks!!!!!
Thanks a lot!!!!!
In Netbeans 6.9.1 Works Correctly, except for the "Set Action", but the code works 1000%
Thanks!!!!!
Thanks a lot!!!!!
In Netbeans 6.9.1 Works Correctly, except for the "Set Action", but the code works 1000%
Thanks!!!!!
@Itbangladesh I think the idea in the card layout is to avoid using setVisible() all together. The card layout manages which "card" to show.
Thanks, great tutorial! When I tried it, I first got the error "cannot find symbol: class CardLayout", perhaps because I created a Java Application instead of a Java Desktop Application. However, everything worked fine after I included "import java.awt.*;"..
Cheers!
this tutorial works but when i tried to use it in an applet file, the 'set action' option is not there.. is there a way to use this method when dealing with applets?
the project that i am working on needs to be embedded in a browser so i can't use this method.. :(
Thanks~
This tutorial is still relevant today. Thanks!
Thanks Vincent.
You are a good teacher!
In Netbeans 7 after adding the code we have to Shift+Ctr+I to import layouts.
Also after dragging a jPanel I had to drag it to MainPanel in inspector window to keep it in same tree structure.
Very good tutorial. Thanks you again.
Thanks a lot.
I am a senior software engineer of 50 years experience who is now trying to learn netbeans and java. I spent several weeks trying to figure this out before I found your tutorial. I am using Netbeans 7. and had just a few little things to adjust.
Many thanks for the tutorial.
It is of great help. I was really struggling with the card layout till I found your blog.
Keep up the good work.
Post a Comment